Bench answer
The reliable starting point
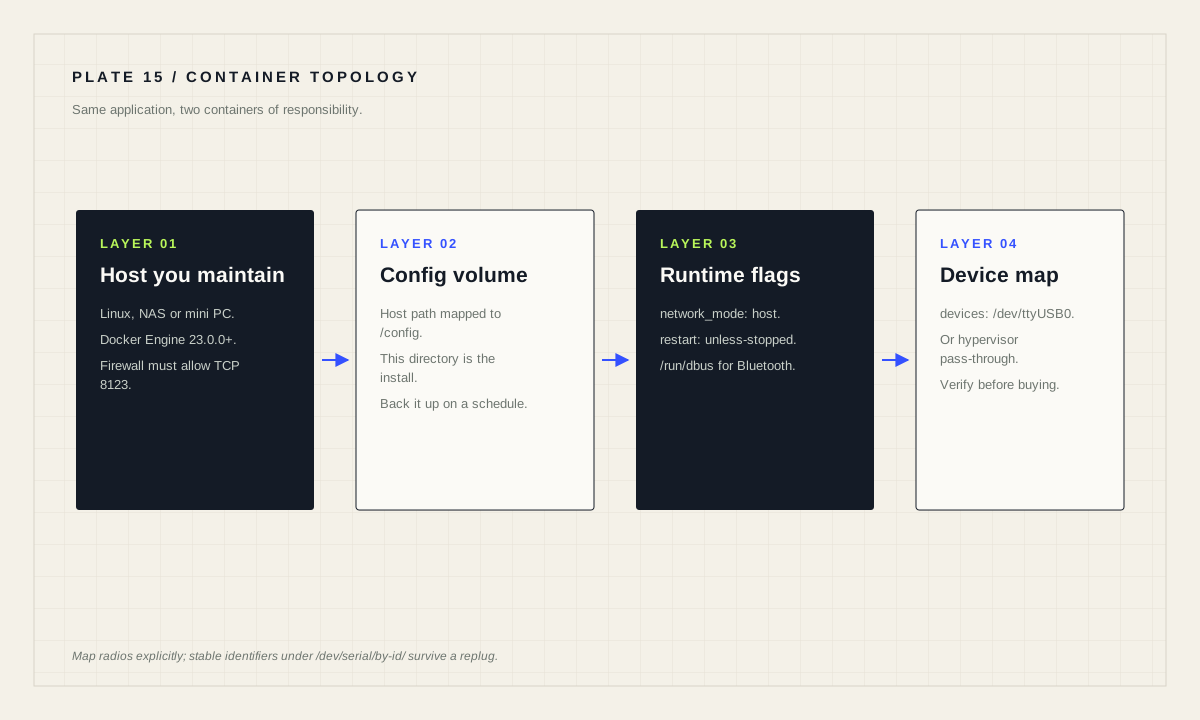
Home Assistant Container needs Docker Engine 23.0.0 or later; Docker Desktop will not work. Run it with your configuration mounted at /config, host networking and a restart policy, and map any radio device explicitly. Remember the boundary: Container installations have no app support, so Thread and Z-Wave have no out-of-the-box path. If you want a virtual machine instead, use the published Home Assistant OS images with at least 2 GB of RAM, 2 vCPUs and UEFI boot — that keeps app support while still sharing your existing host.
Decide which container you actually want
Two container-shaped options exist and they are not equivalent. Home Assistant Container runs Home Assistant Core as a single container on your Docker host. Home Assistant Operating System in a virtual machine runs the full ecosystem, including the Supervisor and apps, inside a VM on the same physical hardware.
People who want “Home Assistant on my server” often assume they want the first and actually want the second. The documented difference is decisive: the installation comparison marks apps as unavailable on Container, and notes that integrations controlled by apps — explicitly including Thread and Z-Wave — have no out-of-the-box support there.
Choose Home Assistant Container when you are comfortable owning updates, you do not need apps, and you want Home Assistant to sit beside other services under one runtime. Choose the virtual machine when you want the recommended experience on hardware you already run.
Prerequisites that fail loudly later
The Linux installation page is explicit about two prerequisites. You need an operating system and a container runtime already set up, and if you use Docker you need Docker Engine 23.0.0 or later. It also states plainly that Docker Desktop will not work; you must use Docker Engine.
That second sentence is the single most common wasted evening in this topic. Docker Desktop on a laptop looks like it should be fine, produces a running container, and then behaves incorrectly around host networking and device access. Read the requirement as a hard boundary rather than a preference.
Decide the configuration path before the first run. The documented mapping points a host directory at /config inside the container, and that directory is your installation. Put it somewhere backed up, somewhere you can find, and somewhere that is not inside a temporary folder.
Use Compose so restarts are boring
The documentation shows both a long docker run command and a Compose file, and observes that as the command grows, switching to docker compose can be preferable because it supports automatic restart on failure or system restart. Prefer Compose from the beginning; the file becomes documentation of your own deployment.
The published example mounts your configuration directory at /config, mounts /etc/localtime read-only, mounts /run/dbus read-only, sets restart: unless-stopped, enables privileged: true, uses network_mode: host and sets the TZ environment variable. The D-Bus mount is optional in general but required if you plan to use the Bluetooth integration.
services:
  homeassistant:
    container_name: homeassistant
    image: "ghcr.io/home-assistant/home-assistant:stable"
    volumes:
      - /PATH_TO_YOUR_CONFIG:/config
      - /etc/localtime:/etc/localtime:ro
      - /run/dbus:/run/dbus:ro
    restart: unless-stopped
    privileged: true
    network_mode: host
    environment:
      TZ: Europe/Amsterdam
Start it with docker compose up -d. Once running, Home Assistant should answer at http://<host>:8123 using the hostname or IP address of the system, and you can continue with onboarding.
Expose radios explicitly
A container cannot see a USB radio unless you map it. To use Zigbee or other integrations that require device access, map the appropriate device into the container and make sure the user running the container has the correct privileges for the /dev/tty* file. In Compose this is a devices: entry; on the command line it is --device.
services:
  homeassistant:
    # ...
    devices:
      - /dev/ttyUSB0:/dev/ttyUSB0
One practical refinement the documentation's example invites: /dev/ttyUSB0 is assigned in enumeration order and can move when you replug hardware or add a second dongle. Where your system provides them, stable identifiers under /dev/serial/by-id/ survive that reshuffle and prevent a coordinator from silently pointing at the wrong device after a reboot.
For a virtual machine instead of a container, the equivalent step is hypervisor USB pass-through. The documented virt-install example identifies the dongle with lsusb and attaches it with --hostdev busID.deviceId, using a Zigbee dongle on bus 003, device 003 as the illustration.
Updating is your job now
With Home Assistant Container there are no one-click updates. The documented sequence is to pull the image, stop the container, remove it and start a new one — and the documentation notes that if the pull reports the image is up to date, you can stop there. With Compose the same intent becomes a pull followed by recreating the service.
# Compose workflow
docker compose pull
docker compose up -d

# Restart without changing the image
docker compose restart
Because updates are manual, they are also skippable, which is the real risk. The security guidance for Home Assistant lists keeping your system up to date with each monthly release as one of the most important things you can do. Put the update on a calendar and take a backup before it, so that “update later” never becomes “update never”.
Restarting after a configuration change has three documented routes: the three-dot menu under Settings → System, the homeassistant.restart action in Developer tools → Actions, or a restart from a terminal.
The three failures that look like bugs
The frontend is unreachable from another machine. The documentation names this directly: on newer Linux distributions host access is very limited, and you may need to open the firewall for TCP traffic to port 8123. On UFW systems that is sudo ufw allow 8123/tcp.
The container will not start on certain ARM64 hardware. Home Assistant Container uses the jemalloc memory allocator, and its configuration can cause issues on hardware with a page size larger than 4K, including some ARM64 SoCs. The known indicator is the message <jemalloc>: Unsupported system page size, and the documented remedy is to set the DISABLE_JEMALLOC environment variable to any value.
Something that “should be an add-on” is missing. It is not missing; it does not exist on this installation type. That is the boundary you accepted, and the fix is either an equivalent service you run yourself as a separate container or a migration to Home Assistant Operating System.
Container deployment gate
- Docker Engine 23.0.0 or later, not Docker Desktop.
- Configuration directory mapped to
/configand included in backups. - Restart policy set so the container returns after a host reboot.
- Radio devices mapped explicitly, ideally by stable identifier.
- Port 8123 reachable through the host firewall.
- A written update procedure with a backup step before it.
Source desk
Primary documentation used for this guide. Interface names and behaviors can change; confirm the current page before changing a live installation.
- Linux installationOfficial Docker, Compose, device mapping, update and jemalloc guidance.Official source ↗
- InstallationOfficial installation-type comparison and app availability boundary.Official source ↗
- Securing your Home AssistantOfficial guidance on keeping the system current with monthly releases.Official source ↗
Source review completed .
Frequent questions
Which Docker version does Home Assistant Container require?
The documentation states that Docker Engine 23.0.0 or later is required, and that Docker Desktop will not work.
Can I use apps with Home Assistant Container?
No. Container installations do not have access to apps, and integrations controlled by apps such as Thread and Z-Wave have no out-of-the-box support there.
How do I update Home Assistant Container?
Pull the current image, then stop, remove and recreate the container; with Compose this becomes docker compose pull followed by docker compose up -d. If the pull reports the image is up to date, no further action is needed.
Why can other devices not reach my container on port 8123?
Newer Linux distributions restrict host access. The documentation suggests opening TCP port 8123 in the host firewall, for example with sudo ufw allow 8123/tcp on UFW systems.
What does the jemalloc unsupported page size error mean?
Home Assistant Container uses jemalloc, whose configuration can fail on hardware with a page size larger than 4K such as some ARM64 SoCs. Setting the DISABLE_JEMALLOC environment variable to any value disables it.