Bench answer
The reliable starting point
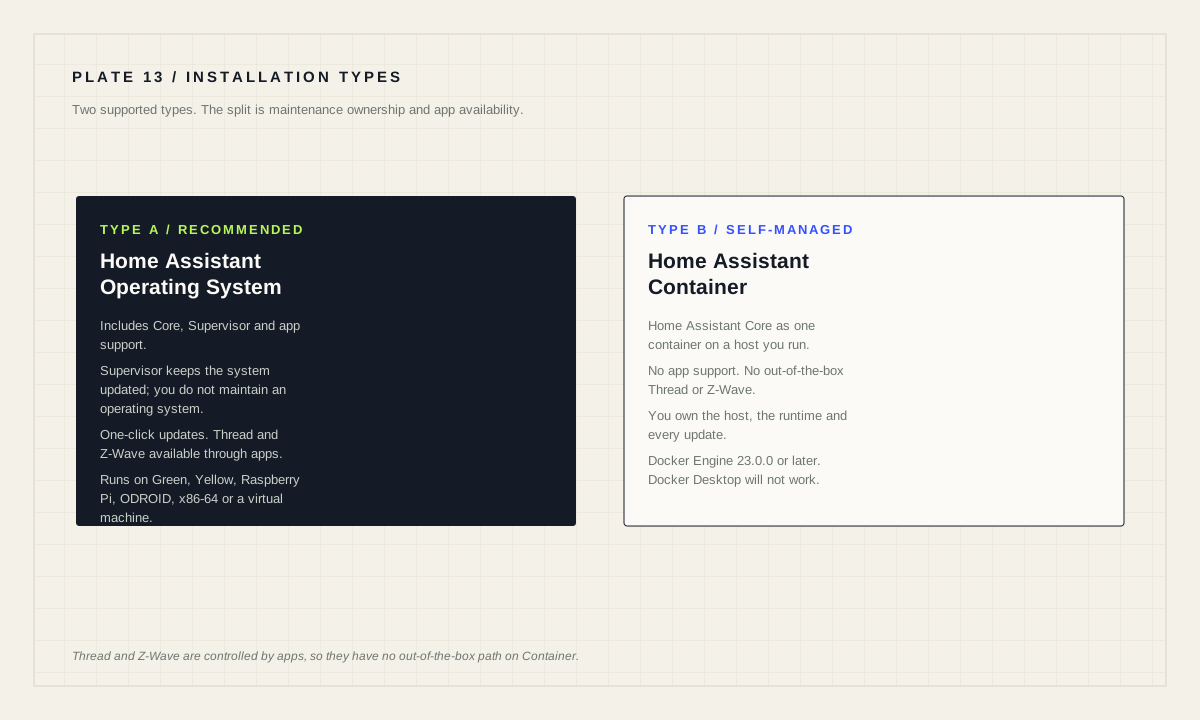
Home Assistant currently documents two installation types: Home Assistant Operating System and Home Assistant Container. The operating system is the documented recommendation for most people because it includes Home Assistant Core, the Supervisor and support for apps, and it manages its own updates. Home Assistant Container gives you a plain container you manage yourself, without app support — which also removes the out-of-the-box path for Thread and Z-Wave. Choose Container only if you already run a container host on purpose and are willing to own updates.
Start from the two documented types
The Home Assistant installation page describes two installation types. Home Assistant Operating System is an embedded, minimalistic operating system built to run the Home Assistant ecosystem on single-board computers or virtual machines. It bundles Home Assistant Core, the Home Assistant Supervisor and support for apps, and the Supervisor keeps the system up to date so you do not manage an operating system yourself. The documentation names it the recommended installation type for most users.
Home Assistant Container is a standalone container-based installation of Home Assistant Core. You bring your own operating system and container runtime, and you handle updates manually. Any OCI-compatible runtime can be used, although the documentation focuses on Docker.
The practical consequence is not philosophical. The comparison table on the installation page marks apps as available on the operating system and unavailable on Container, and the same page notes that some integrations — including Thread and Z-Wave — are controlled by apps, so there is no out-of-the-box support for them on a Container installation. If your device plan depends on those radios, that single line decides the question.
You are choosing a maintenance contract
Read the choice as a maintenance contract rather than a feature list. With Home Assistant Operating System, the project maintains the base image, the update mechanism and the app catalogue. Your job is to keep backups and apply releases. With Home Assistant Container, you maintain the host operating system, the container runtime, the update cadence, the storage layout and the firewall — and you gain the freedom to run Home Assistant beside unrelated services on hardware you already operate.
Neither contract is inherently better. The failure modes differ. An operating-system install fails in ways the project has documented and can guide you through. A Container install fails in ways specific to your host: a full disk on the host, a firewall rule you added months ago, a runtime upgrade that changed device permissions. Those are solvable, but you are the person who solves them.
Ask one question honestly before you decide: when this breaks on a weekday evening, do you want to read Home Assistant documentation, or your own notes about your own server? A reader who enjoys the second answer will be happy with Container. A reader who winces at it should take the operating system.
Compare the two paths on the things that bite
The table below reduces the decision to the properties that change your week, not the ones that change your screenshot. It reflects what the installation documentation states about each type; verify against the current page before you commit hardware.
Scroll horizontally to compare every column.
| Property | Home Assistant OS | Home Assistant Container |
|---|---|---|
| Who maintains the OS | The project, through the Supervisor | You |
| Apps available | Yes | No |
| Thread and Z-Wave out of the box | Yes, via apps | Not out of the box |
| One-click updates | Yes | Manual image pull and recreate |
| Runs beside your other services | Dedicated machine or VM | Yes, on your existing host |
| Skills assumed | Headless setup | Linux, command line, containers |
Automations, dashboards, integrations, blueprints and backups are listed for both types. The split is concentrated in apps and update handling, which is exactly where a beginner spends the least attention and pays the most later.
Match the type to a physical shape
Home Assistant OS reaches you in several shapes. Home Assistant Green ships with the operating system already installed; you add power and network. Home Assistant Yellow is assembled from a Raspberry Pi Compute Module 4 with a heatsink and then flashed. You can also flash the operating system onto a Raspberry Pi 4 or 5, an ODROID device, or an x86-64 machine, and the documentation lists a Raspberry Pi minimum of 2 GB RAM with a microSD card and an Ethernet connection.
Home Assistant OS also runs inside a virtual machine. The Linux installation page publishes prebuilt images for VirtualBox and KVM, and states minimum virtual-machine resources of 2 GB of RAM and 2 vCPUs, with UEFI required to boot. That combination is often the best answer for someone who already runs a hypervisor and wants app support anyway.
Home Assistant Container fits a machine you already administer: a Linux server, a NAS that runs containers, or a Raspberry Pi running a general-purpose Linux distribution. The documentation notes that Docker Engine 23.0.0 or later is required and that Docker Desktop will not work — you must use Docker Engine.
What the first hour actually looks like
Whichever type you pick, the first successful moment is the same: a browser reaches the onboarding screen. The documented address is http://homeassistant.local:8123. On stricter networks or older Windows versions, try http://homeassistant:8123, or the device's IP address with the same port.
During first startup, Home Assistant completes its installation and needs outbound network access. The troubleshooting page names the requirements explicitly: time synchronization over NTP, plus reachability of version.home-assistant.io for version information, github.com for app store metadata, and ghcr.io for updates. A restrictive DNS filter or guest VLAN that blocks any of those turns a healthy install into a stalled one.
Write down three facts before you close the laptop: the address that worked, the device's IP address, and where your first backup is stored. Those three lines are what a future you will want at the exact moment the dashboard does not load.
Before you call the install finished
- Onboarding completed and a named user account exists.
- The instance is reachable by IP address, not only by hostname.
- Outbound access to NTP, version.home-assistant.io, github.com and ghcr.io is not blocked.
- A backup has been created and copied off the device.
- The installation type is recorded somewhere you will find later.
Changing your mind later is a migration, not a toggle
Switching installation type is a migration. You move configuration and history through a backup, then rebuild the parts the new type handles differently — most obviously anything an app used to provide. Plan it as a scheduled task with a rollback, not as a curiosity on a Sunday night.
That is the strongest argument for taking the recommended path first. If you begin on Home Assistant Operating System and later discover you want the freedom of a container host, you migrate once, deliberately, with a working system as the fallback. If you begin on Container because a tutorial made it look elegant and then hit the Thread or Z-Wave boundary, you migrate under pressure with devices already paired.
Keep the decision reversible in the cheapest way available: take a backup before every deliberate change, store one copy off the device, and confirm you can actually restore it. A backup you have never restored is a plan, not a safeguard.
# Confirm the instance answers on the documented port
# Replace the address with your hostname or IP
curl -I http://homeassistant.local:8123

# If that fails, try the plain hostname, then the IP
curl -I http://homeassistant:8123
curl -I http://192.0.2.10:8123Source desk
Primary documentation used for this guide. Interface names and behaviors can change; confirm the current page before changing a live installation.
- InstallationOfficial installation types, comparison table and hardware paths.Official source ↗
- Linux installationOfficial virtual-machine minimums and Home Assistant Container prerequisites.Official source ↗
- Troubleshooting installation problemsOfficial first-startup network requirements and access symptoms.Official source ↗
- Concepts and terminologyOfficial definitions for apps and core ecosystem terms.Official source ↗
Source review completed .
Frequent questions
How many Home Assistant installation types are there?
The current installation documentation describes two: Home Assistant Operating System and Home Assistant Container. Home Assistant Operating System is named the recommended type for most users.
What do I lose by choosing Home Assistant Container?
Container installations do not have access to apps. Because some integrations such as Thread and Z-Wave are controlled by apps, there is no out-of-the-box support for them on Container.
What are apps in Home Assistant?
Apps are additional standalone third-party software packages that can be installed on Home Assistant Operating System. Older community material refers to the same packages as add-ons.
What are the minimum resources for a Home Assistant virtual machine?
The Linux installation documentation lists minimum virtual-machine resources of 2 GB of RAM and 2 vCPUs, and notes that UEFI is required to boot.
Can I use Docker Desktop to run Home Assistant Container?
No. The documentation states that Docker Desktop will not work and that Docker Engine 23.0.0 or later is required.